Step by Step Boundary Podcast Microphone Table Setup
By Mei-Lin Zhou • 2nd Sep
What to do
For a small, single-table podcast, build the setup around participant proximity and room acoustics—not the assumption that one boundary microphone covers everyone.
- Start with: Confirm that the show has a small, seated, single-table format, then assess how reverberant the room sounds.
- Then: Place microphones so intended speakers remain within arm’s reach, without relying on a universal center position, coverage radius, or seat count.
- Important prerequisite: Check the exact microphone, mixer, recorder, or interface manuals before connecting anything or enabling phantom power. If distant voices are unclear, switch to individual microphones, goosenecks, or automatic mixing.
Important: Boundary microphones are an area-miking option, not a universal replacement for close individual microphones; the evidence does not establish a fixed number of speakers or exact placement distance for one unit.
A microphone podcast setup around one table can make a multi-person conversation feel natural, provided you treat it as an area-miking decision, not a promise that one small microphone will solve every room. A boundary microphone can be a practical option for a small shared-table discussion, but room size, the number of active participants, the conversation format, and the room's acoustics are factors to consider when choosing the approach.
The aim is not to create a complicated studio podcast setup. It is to build a repeatable table workflow that lets people talk without constantly managing equipment. Make the desk disappear: guests should focus on the conversation, while you listen for whether every voice remains understandable.
Step 1: Confirm That a Shared-Table Boundary Setup Fits the Show
Start with the format, not the microphone.
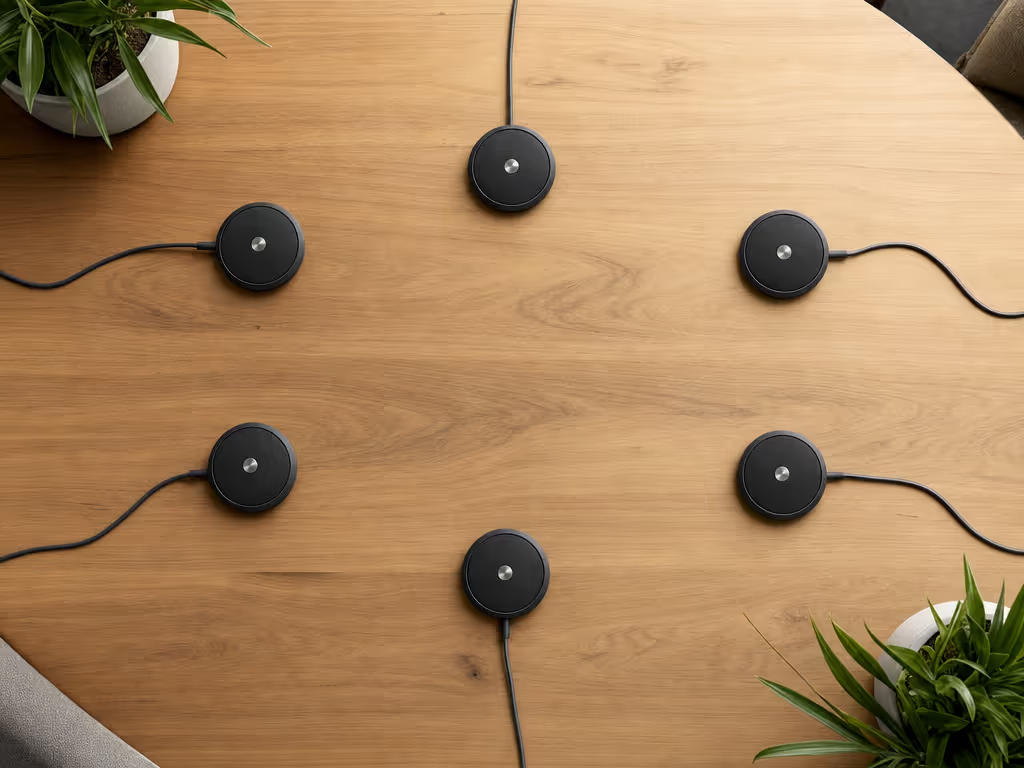
A boundary setup is most plausible when your show is a small, seated discussion around one table and does not require sound reinforcement in the room. Manufacturer guidance for small huddle rooms (described as spaces for four to eight people around a single table) suggests using a couple of boundary microphones on the table as an area-miking approach. That is useful direction, but it is not a guarantee that one microphone will cover a fixed number of podcast guests.
Before you set anything out, answer these questions:
- How many people will speak regularly? Count active voices, not just chairs in the room.
- Is the format open discussion or structured turns?
- Is everyone at one table?
- Does the room sound reverberant when people speak? Long reverberation can blur phonemes and reduce speech intelligibility.
- Do you need each speaker isolated for editing? A shared-table approach may not be the right workflow if separate control of each voice is essential.
A single-table solution is not automatically a single-microphone solution.
If the discussion involves a larger group, plan for an escalation path now rather than trying to rescue distant voices later.
Step 2: Prepare the Room and the Table Before Placement
The room is part of the recording chain. Because room acoustics can affect speech intelligibility, use this room acoustics guide for podcasting to identify practical ways to reduce echo before you place the boundary microphones. As talkers move farther from a microphone, the direct sound level drops, and reflected sound in the room complicates that simple relationship. In practice, that is why distant microphone placement can produce hollow, indistinct sound and raise the potential for echo problems.
Do a quick speaking check in the empty setup area. You are not measuring acoustics or chasing advanced treatment targets. You are simply identifying whether speech already feels blurred in the room before the equipment is connected.
Then prepare the table:
- Plan around papers and tabletop materials. Keep them from covering the microphones. If your format requires lots of papers, manufacturer conference guidance notes that tabletop goosenecks are often preferred because papers cannot inadvertently cover them.
- Decide where cables will leave the table. Route them away from walking paths whenever possible. If a cable must cross a walking zone, protect that crossing rather than leaving a loose run underfoot.
- Keep the conversation layout stable. Ask guests to stay in their intended seats for the test and the recording.
This preparation reduces retake risk. I was reminded of that during a live webinar: the more a host has to manage an unstable, crowded hollow desk, the less attention is left for the conversation.
Step 3: Map People to Microphone Coverage - Without Guessing a Magic Seat Count
Lay out seats first, then decide how many microphones the table needs. Do not begin with an assumed center-table position or a claimed coverage radius; neither is a reliable universal rule for boundary microphones.
Instead, use proximity as your decision test. Manufacturer guidance for conferencing recommends keeping microphones within arm's reach of participants to improve sound quality. For finer control over distance, angle, and plosive reduction, follow this podcast mic positioning guide while testing each seat. Use that as a practical layout criterion, while remembering that it is not a boundary-microphone-specific pickup-range specification.
For a small shared table, start with the idea of a pair of boundary microphones, not an all-or-nothing single unit. Then inspect the result:
- Can every intended speaker reasonably reach a microphone without stretching or changing seats?
- Are some guests noticeably farther away than the others?
- Will the moderator, guest, or rotating speaker sit outside the practical coverage layout?
- Does the conversation include an audience question area that is not part of the table?
A conference table microphone arrangement should follow the people, not visual symmetry. The goal is understandable speech from all intended participants, not a tidy-looking tabletop.
Do not assume a boundary microphone has universal specifications
Because this article does not identify a specific boundary microphone, do not assume its connector type, power requirement, output level, or pickup pattern. Check that microphone's documentation for those details.
Step 4: Connect the Exact System Safely
Because this article does not identify a specific boundary microphone, follow the manuals for your specific microphone, recorder, mixer, or interface. Do not assume a connector type, output level, or phantom-power requirement from the microphone category alone.
Use this short connection checklist:
- Confirm the microphone's required connection from its documentation.
- Confirm that your recording device accepts that connection.
- Check whether the microphone is designed to use phantom power before enabling it.
- If your device offers phantom power by input, enable it only where the connected microphone documentation calls for it.
- Route cables away from walking paths, and protect any necessary crossing.
For example, the ART MX624 mixer provides balanced XLR microphone inputs and independently selectable +48 V phantom power. The safe rule is simple: match the manuals, not assumptions. Once the system is connected, use proper podcast mic gain staging to set clean levels without adding unnecessary noise or clipping.
Step 5: Run a Zero-Post Conversation Test
A short test is more valuable than spec-sheet confidence. Record a realistic sample with everyone seated as they will be for the episode. Use ordinary speech, introductions, questions, interruptions, and any recurring format elements.
Listen back without trying to fix the recording first. This is your zero-post pass. Ask:
- Can you understand every person?
- Do distant voices sound hollow or indistinct?
- Does the room blur consonants or make speakers difficult to follow?
- Does the layout work when more than one person speaks?
- Would you be comfortable releasing this conversation with only light editing?
Monitor at a normal listening level and make one change at a time: seating layout, microphone count, or the decision to move away from shared pickup. Do not mask a coverage problem with a more complicated workflow before you have established that the basic layout works.
Quiet hardware makes your voice the loudest thing in the room. That principle matters more than a clever arrangement that forces guests to remember rules all session.
Step 6: Know When to Stop Forcing the Boundary Approach
Boundary microphones are one option, not a universal answer for multi-speaker recording. Move to individual tabletop microphones, goosenecks, or another managed microphone system when the test reveals that shared pickup is not delivering understandable speech for everyone.
For larger meeting-room-style systems, manufacturer guidance says one microphone for every two people is often sufficient, though this is not a boundary-microphone-specific rule. Where four or more microphones are in use, turning off unused microphones or using an automatic mixer or discussion system can help preserve intelligibility.
Choose an escalation path when:
- Guests at the far end are consistently less intelligible.
- The room is reverberant enough that speech loses definition.
- The group is large.
- You need a participant to have dedicated microphone access.
- Papers and tabletop materials make a gooseneck-style station more practical.
This is also where an individual-mic workflow may be worth considering for a different show format.
Final Setup Checklist
Before you press record, confirm:
- The room and conversation format suit shared-table pickup.
- You have planned for a table system, not assumed one microphone covers everyone.
- Every regular participant is within arm's reach of a microphone.
- Papers do not cover the microphones, and cable routes are organized.
- Phantom power is enabled only if the exact microphone documentation requires it.
- You recorded and reviewed a realistic zero-post test.
- You have an escalation plan if distant speech is not intelligible.
FAQ
What kind of microphone do I need for a podcast with several people at one table?
For a shared-table podcast, choose based on room size, active participant count, presentation style, proximity, and room acoustics. Boundary microphones can serve as an area-miking option in a small single-table setting, while individual tabletop microphones, goosenecks, or managed multi-microphone systems become sensible alternatives when the group or room makes shared pickup less intelligible.
Your Actionable Next Step
Set up the seats for your next episode, place the microphones so intended speakers are within arm's reach, and record an unscripted discussion that includes the usual conversation elements. Listen once with no processing. If every voice is clear, you have a workable starting point. If not, add coverage or change microphone approach before building the rest of the production around a weak source recording.
Related Articles