Professional Podcast Mics: Best for YouTube Video Sound & Looks
By Luis Cabrera • 3rd Dec
When your face fills the frame but your audio sounds like it's coming from a tin can, credibility evaporates. That's why choosing the right professional podcast microphone isn't just about sound, it's about creating a cohesive video podcast audio experience that feels intentional. After rebuilding a student newsroom's gear from a shoebox of mismatched parts (and one creaky arm), I've learned that your setup must solve both problems: studio-worthy sound and camera-ready aesthetics. Let's cut through the noise with a step-by-step plan that respects your budget, space, and sanity.
Step 1: Define Your Dual Needs: Sound Meets Sight
Stop Chasing "Perfect" Specs: Solve Real Room Reality
You're recording in spaces never designed for audio: bedrooms with HVAC hum, home offices sharing walls with street noise, apartments where neighbors' bass travels through floors. Spec sheet paralysis won't serve you here. Instead, prioritize two things:
-
Noise rejection that works off-axis: Dynamic mics (like Shure MV7+) excel in noisy rooms by rejecting sound from the sides and rear. But if your mic faces sideways toward a window, it'll still capture traffic. Position matters more than polar patterns alone.
-
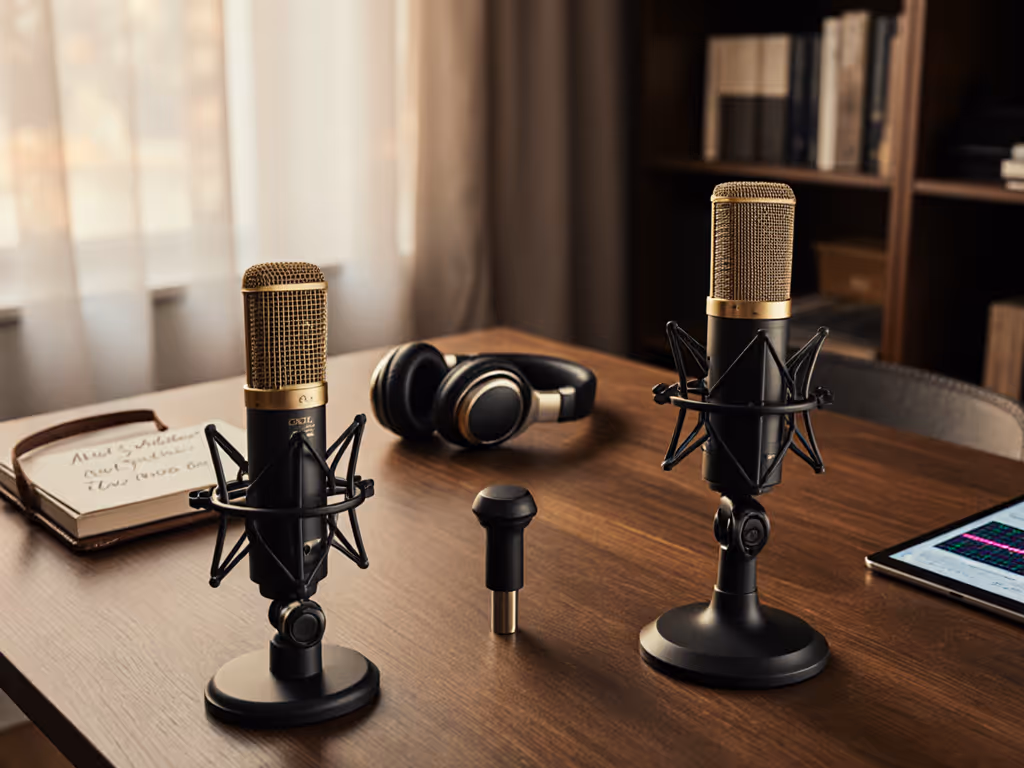
On-camera microphone aesthetics that don't sabotage your presence: That sleek matte-black USB mic might sound great until it blocks half your face on camera. Bulky arms wobbling in frame whisper "amateur" to viewers. Your gear should disappear visually while dominating audibly.
Room Reality Check: Tape a phone to your monitor right now. Record 30 seconds. If your current mic obstructs your face or picks up keyboard clatter, you're fighting two battles at once (fix the visual and audio flaws together).
The Dual Audio-Visual Setup Puzzle
Your ideal mic must balance:
| Priority | What Not to Do | Real-World Fix |
|---|---|---|
| Visual Impact | Mounting a large-diaphragm mic parallel to your face (blocks sightlines) | Use vertical mounts or mini mics below eye level |
| Noise Control | Choosing condensers in echoey rooms (amplifies room sound) | Opt for dynamics or tight cardioid patterns |
| Scalability | Buying isolated USB mics without reusable mounts | Select models with standard 3/8 inch threads for future arms |
This isn't about magic specs, it's about total cost of setup including where and how you'll place it. A $100 mic that forces you to buy a $60 arm adapter? That's $160 already. If echo is your main issue, start with our room acoustics guide.
Step 2: Choose Your First Mic Without Breaking the Bank
Skip the "Dream Rig" Trap: Start Where You Actually Are
Most creators over-invest in the mic while under-investing in placement. Instead of chasing the "best podcast mic ever," ask:
- "Does this mic sound clear in my room, unprocessed?" (If demos use heavy EQ, run)
- "Will it fit below my camera without cutting my chin off?" (Shorter mics = more framing flexibility)
- "Can I reuse mounts if I upgrade later?" (Avoid proprietary arms)
Top Picks for Video-Centric Setups (Under $150)
RØDE NT-USB Mini: The Stealth Visual Performer
When you need a mic that doesn't dominate the frame, this compact powerhouse shines. Its narrow cylindrical body (just 2 inches wide) sits neatly below your chin without blocking expressions, which is critical for on-camera microphone aesthetics. The built-in pop filter and USB-C simplicity mean setup takes 90 seconds, not 90 minutes. Crucially, its tight cardioid pattern rejects desk thumps and keyboard noise better than most multi-pattern mics (which people rarely switch anyway). Dive deeper in our RØDE NT-USB Mini review with tests in untreated rooms.
Why it earns its place: At $109, it solves 90% of solo creator needs today while using a standard thread mount. Upgrade to XLR later? Keep the shock mount and arm. This is price-to-performance engineering.
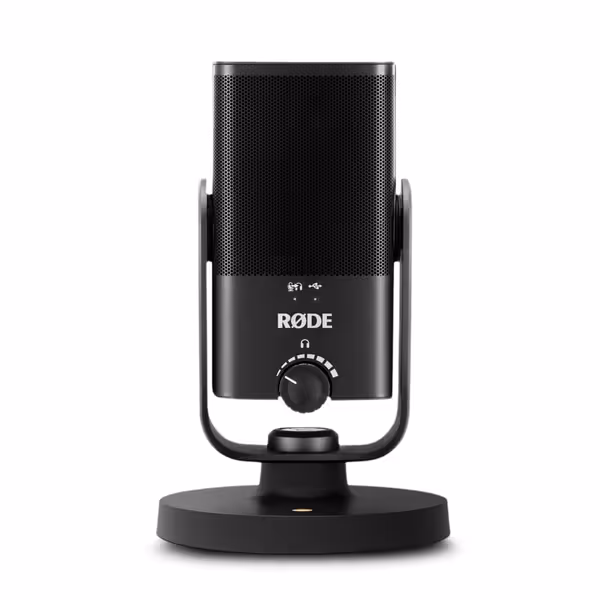
RØDE NT-USB Mini
Studio-quality USB mic: clear, warm voice with free software processing.
$109
ConnectivityUSB
ConnectivityUSB
Pros
Delivers warm, clear, studio-quality sound for vocals and instruments.
Integrated DSP (noise gate, compressor, APHEX) via free RØDE Connect.
Compact, easy setup, with direct headphone monitoring.
Cons
Background noise performance can be inconsistent for some users.
Customers find this microphone delivers studio-quality sound that makes voices sound deeper and crystal clear, while being solidly built and easy to set up. They appreciate its functionality for podcasting and music recording, and consider it excellent value for the price. The background noise performance receives mixed feedback - while some report minimal background noise, others mention constant hum around 440 Hz.
Customers find this microphone delivers studio-quality sound that makes voices sound deeper and crystal clear, while being solidly built and easy to set up. They appreciate its functionality for podcasting and music recording, and consider it excellent value for the price. The background noise performance receives mixed feedback - while some report minimal background noise, others mention constant hum around 440 Hz.
HyperX QuadCast 2 S: For RGB-Loving Streamers Who Want Control
If you're building a branded studio environment (not a "broom cupboard"), this offers visual flair and utility. Its 4 polar patterns adapt to duet interviews or room miking, while the RGB lighting subtly signals mute status on camera, so no verbal "one sec!" needed. But here's the reality check: at 10 inches tall, it will block part of your face unless mounted very low. Best for creators who prioritize software monitoring (via NGENUITY) over raw simplicity.
Room reality note: The omnidirectional mode amplifies room noise. Only useful in treated spaces, otherwise stick to cardioid.
Blue Yeti: The "Familiar But Flawed" Option
Yes, it's popular (60k+ reviews). But that bulbous shape? It will cut off your jawline on HD video. And its loose suspension makes it prone to desk thumps. Only consider this if you're on a tight budget ($88) and recording from fixed positions. The multiple patterns seem useful but often confuse new users, and most stick to cardioid anyway.
Pro tip: If you own one, mount it vertically so the capsule faces up toward your mouth, not sideways. It minimizes visual obstruction by 40%. See our Blue Yeti vs newer USB mics comparison for real-world results.
What Not to Buy (Based on Actual Room Tests)
- Large-diaphragm condensers (e.g., Audio-Technica AT2020USB) in untreated rooms, they'll catch every echo. Save these for quiet, padded spaces.
- Mics requiring Cloudlifters (like Shure SM7b) as your first purchase. Your interface's preamp likely can't drive them cleanly, adding hiss and $150+ in extra gear.
"Sequence upgrades so each piece keeps earning its place." Start with a mic that solves current problems without demanding future fixes.
Step 3: Map Your Low-Regret Upgrade Path
Reuse > Replace: Building a Scalable System
Your first mic should be the foundation, not a stepping stone to buy again. Here's how to plan your upgrade path wisely:
-
Phase 1: USB Solo Creator ($80-$120)
- Buy: RØDE NT-USB Mini + reusable arm mount ($25)
- Why: Compact size fits video frames; standard mount transfers to Phase 2.
- Avoid: Bundles with proprietary arms (they become landfill).
-
Phase 2: USB/XLR Hybrid (Duet Guests) ($220-$300)
- Upgrade: Shure MV7+ (USB/XLR) reusing your arm and mount
- Why: Adds XLR for guest mics while keeping USB simplicity. Sound improves 30% in noisy rooms.
- Street price note: Wait for Black Friday (MV7+ drops to $199 reliably). If you're eyeing flexible connectivity, browse our USB-XLR hybrid mic roundup.
-
Phase 3: Full XLR Studio ($500+)
- Add: Used Rode Procaster ($80) + Focusrite Scarlett ($120) reusing both mounts
- Total cost of setup vs. starting over: $500 vs. $800+ for new ecosystem.
The "Spend Once Where It Compounds" Rule
That reused arm and shock mount? They're silently reducing your total cost of setup with every upgrade. Like the student newsroom that built a four-mic roundtable for $500, strategic sequencing means:
- No buyer's remorse: Each piece pulls double duty (e.g., USB now, XLR later)
- Zero accessory churn: Same pop filter mounts on USB and XLR mics
- Faster room adaptation: You're optimizing placement before chasing gear
When a podcaster asked me, "Should I get the Elgato Wave:3 for streaming?", I told them, only if your current mic fails Phase 1. Its Wave Link software is slick, but no app fixes bad placement. At $150, it's worth it if you're already getting clean audio but need advanced mixing. Otherwise? Spend once where it compounds on fundamentals first.

Elgato Wave:3 USB Condenser Microphone
Studio-quality USB mic with anti-distortion technology and powerful software suite.
$149.99
Audio Resolution24-bit/96kHz
Audio Resolution24-bit/96kHz
Pros
Broadcast-quality sound; rivals XLR mics.
Integrated software for easy mixing & control.
Clipguard prevents audio distortion and peaking.
Cons
Picks up background noise in untreated rooms.
It sounds like an XLR mic and the Wave Link software is so simple a child could figure it out.
It sounds like an XLR mic and the Wave Link software is so simple a child could figure it out.
Your Action Plan: Start Simple, Scale Smart
Today: Tape your phone to the monitor. Record audio while mimicking your typical posture. Is your mic obstructing sightlines? Picking up keyboard noise?
This Week: Grab the RØDE NT-USB Mini if you're solo (or HyperX QuadCast 2 S for multi-host). Mount it below your chin with a standard arm. Test it speaking normally, no post-processing.
This Month: Reuse that mount when you add your second mic. Track your price-to-performance gains: When does sound quality actually improve versus marketing hype?
Your goal isn't the "best" mic, it's the most cohesive dual audio-visual setup for your space. Stop letting gear chase dictate credibility. Start with proven steps that compound value, every semester.
Related Articles