Extreme Noise Environment Microphones Compared for Podcasts
By Aarya Menon • 29th May
If you record near traffic, HVAC, office chatter, or even construction, choosing the right extreme noise environment microphones matters more than any plugin. This FAQ deep dive compares how different types of professional podcast microphones behave when the room is working against you.
As someone who built a measurement rig specifically to test podcast mics in ugly rooms, my bias is simple: level-matched tests, repeatable noise setups, and zero post processing tell you more in five minutes than ten glowing reviews. Level-match or it didn't happen.
How I test mics when the room is brutally loud
Before we get into specific questions, it helps to understand how I look at extreme environment mic performance.
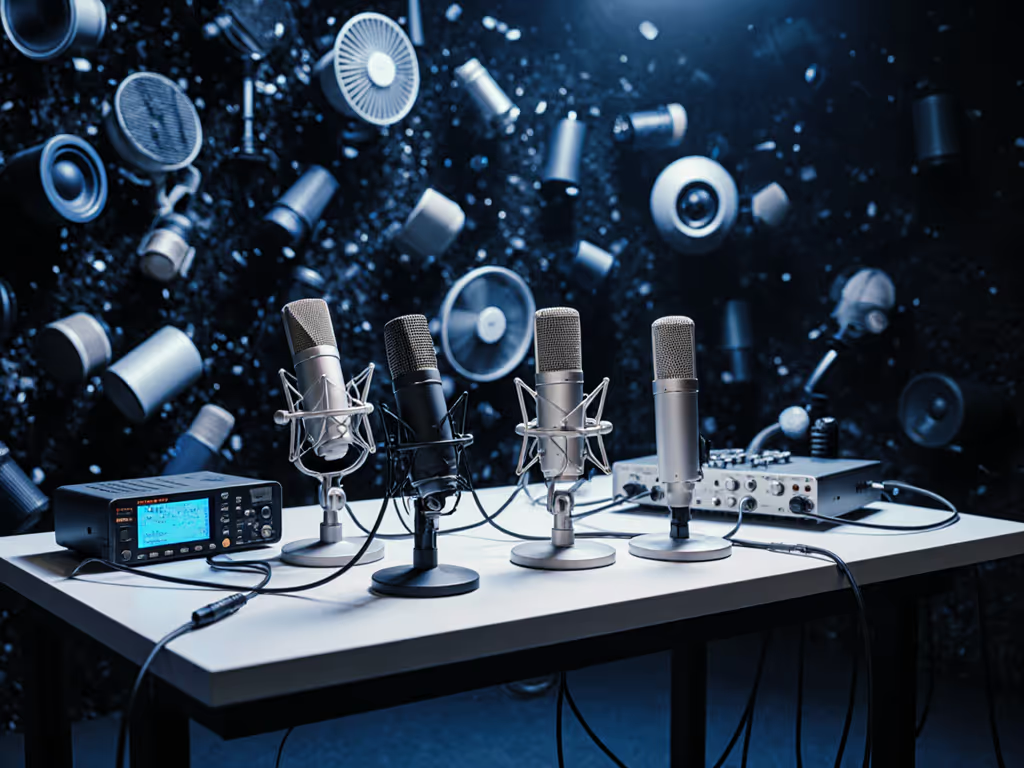
My controlled high-noise test rig (simplified)
When I test a mic for high-noise rejection, the setup looks like this:
- Spoken voice, fixed script, same distance (typically 6-8 cm) from the capsule
- Pink-noise speaker placed off-axis at 90° and 135° to simulate HVAC, computers, or nearby streets
- Additional narrowband noise (keyboard clicks, mouse, desk taps) from realistic positions
- All mics level-matched within 0.2 dB at the listening position
- Identical gain staging into the interface, with peak voice around -12 dBFS and plenty of headroom
- No EQ, no gating, no noise reduction (zero post processing)
This reveals three things very quickly:
- How much constant background noise the mic lets through
- How it colors off-axis sounds (keyboard, chair squeaks, colleagues) compared to on-axis voice
- How much preamp gain you need before hiss becomes a problem (the effective noise floor of your chain)
Level-matched samples in real rooms tell the whole story.
What follows is based on that kind of testing, not marketing copy.
FAQ: Choosing extreme noise environment microphones for podcasts
1. Dynamic vs condenser: which wins in noisy rooms?
For most podcasters in noisy or untreated spaces, a dynamic cardioid is still the safest first choice.[10] For a deeper breakdown, see our dynamic vs condenser guide for untreated rooms.
Dynamic mics usually:
- Are less sensitive than condensers, so they ignore more distant noise at the same gain setting[10]
- Have tighter cardioid or supercardioid polar patterns, giving better off-axis rejection when you work them up close[10]
- Tolerate being spoken into from very close range, which increases your direct voice level relative to the room
Condenser mics can sound beautiful in controlled studios, but in extreme noise they often:
- Pull in HVAC, traffic, and keyboard noise from all directions
- Exaggerate room reflections in small, reflective spaces
- Require more acoustic treatment and better placement discipline
If your environment is closer to a shared office, busy street, or construction site audio capture scenario than a treated studio, choose a neutral dynamic cardioid first and treat condensers as a second-phase upgrade once the room is under control.[10]
2. What matters more: polar pattern or price tag?
For high-noise rejection testing, polar pattern beats price most of the time. Learn how different microphone polar patterns affect rejection and off-axis tone in real rooms.
At conversational distances in real rooms:
- Cardioid patterns are the baseline. They reject sound from directly behind, but still hear quite a bit at the sides.
- Supercardioid and hypercardioid tighten the front lobe and can reduce side noise, but they introduce a rear pickup lobe. That rear lobe matters if your noisiest source (e.g., open door, window, fan) is behind the mic.
- Omnidirectional capsules are almost never desirable for noisy podcast spaces unless you absolutely need multiple voices around one mic.
In my tests, a mid-priced dynamic cardioid, worked close and pointed carefully away from the noise source, consistently beats a more expensive mic with a looser pattern or sloppy placement.
If you want a simple decision rule:
- Put your loudest noise source at 120-150° off-axis to the mic
- Prefer cardioid or supercardioid dynamics that maintain stable tone even when you move a few centimeters
- Spend your budget on stable off-axis response, not just a pretty frequency-response graph
3. Are shotgun mics good for podcasts in extreme noise?
Shotgun mics look appealing on paper: narrow pickup, strong rejection to the sides. In practice, for podcasting they are situational tools, not default choices.
Where shotguns can work well:
- Outdoors, where reflections are minimal
- When the mic is just out of frame for video, pointed at your mouth from above
- When the main noise source is consistently off to the side, like a busy street parallel to your recording position
Where they struggle:
- Small, reflective rooms where their interference tube design makes them react badly to reflections
- Desktop setups where the mic is close to monitors, walls, and ceilings at similar distances
A good professional podcast microphone that is a dynamic cardioid on a boom arm, placed just out of frame but close to your mouth, will usually beat a shotgun indoors for clarity, consistency, and ease of use.
4. How can I run my own high-noise rejection test at home?
You do not need a lab to do high-noise rejection testing. You can approximate it in a few minutes:
-
Set up a reference noise source
Use a phone or small speaker playing pink noise or a recording of your typical background (cafe, office, traffic). Place it at the approximate angle of your worst noise, 90-150° from where the mic points. -
Fix your mic position
Use a boom arm. Distance: around 6-8 cm from your lips, slightly off to the side to reduce plosives. -
Match record levels between mics
Speak a short script at a constant loudness. Adjust preamp gain until your peaks are near -12 dBFS. Swap mics and adjust again to hit the same peak level. Level-matched comparisons are non-negotiable. -
Capture two passes for each mic
- Voice alone, no background noise
- Voice with noise source active at a realistic volume
- Listen critically on headphones
- How loud is the noise vs your voice?
- Does the off-axis noise sound duller than your voice, or just as bright?
- Does your tone change drastically when you move a little?
Log your impressions. Which mic lets you forget about the noise most of the time? That is your winner, regardless of hype.
5. How much gain do I need, and do I really need an inline preamp?
Noisy rooms often push you toward close-mic'd dynamics, which usually have low output and need more clean gain. Set levels right the first time with our podcast gain staging guide.
As a working rule of thumb (from repeated tests across interfaces):
- Many dynamic broadcast-style mics are most comfortable with 55-65 dB of total gain for normal speech at close range
- Budget interfaces often provide around 50-55 dB of gain, and the last 10-15 dB can be hissy
If your interface's preamps are noisy at higher gain settings, an inline preamp (like a clean gain booster) can help. But it is not mandatory if:
- Your interface offers at least ~60 dB of relatively clean gain
- You work the mic close and maintain consistent distance
- You keep your room reasonably quiet between speech segments
Always test your full chain:
- Turn your mic off or mute it at the hardware switch if it has one.
- Turn your interface gain to the level you use while recording.
- Record 10 seconds of "silence" and raise the monitor gain during playback.
If the hiss is prominent before you hear any real-world noise, your noise floor is electronics-limited, and an inline preamp or better interface may be justified. If the hiss is minimal but you hear HVAC and street noise, your environment is the bottleneck, not your preamp.
6. USB vs XLR in extreme noise: which makes more sense?
For noisy spaces, transducer choice and placement are far more important than USB vs XLR. If you are deciding between connections, compare XLR vs USB microphones for podcasting. That said, each path has pros and cons.
USB microphones
- Pros: simple, minimal studio recording equipment, built-in ADC and often onboard headphone monitoring
- Cons: you are locked into that capsule and preamp; some models lack true low-latency monitoring or have limited gain range
XLR microphones into an interface
- Pros: scalable (multi-mic), better routing, easier to standardize kits across co-hosts, wide choice of preamp gain and tone
- Cons: more components to choose and configure; higher upfront complexity
From a high-noise perspective:
- If you are solo and mobile, a good dynamic USB mic with decent gain and headphone monitoring is perfectly viable.
- If you plan to grow into multi-host setups, consistent cross-room sound, and studio recording equipment that can evolve, XLR dynamics into a clean interface will give you fewer bottlenecks later.
7. How do I tame plosives, sibilance, and breath noise without heavy plugins?
Extreme environments make post-processing harder: aggressive de-essing and noise reduction can quickly turn harsh or watery when the raw track is messy.
For step-by-step placement tips that prevent plosives and sibilance, see our microphone positioning guide. You can reduce problems at the capture stage:
-
Plosives (p, b, t):
-
Use an external pop filter plus a foam windscreen for very close talking.
-
Angle the mic slightly off-axis (15-30°) so plosive air misses the capsule.
-
Move a centimeter or two further back if you regularly clip plosives, and compensate with gain.
-
Sibilance (s, sh, ch):
-
Avoid mics with aggressive high-frequency boosts if your voice is already bright.
-
Check how the mic sounds when you slightly rotate it off-axis; some capsules soften sibilance nicely that way.
-
Breath noise:
-
Position the mic between your nose and mouth line, not directly in front of your lips.
-
Lower your monitoring level so you are not tempted to whisper and breathe heavily into the mic.
In comparative tests, the mics that fare best in harsh rooms are usually not the ones with the flashiest top-end detail. They are the boring neutral dynamics that tolerate close working distances without turning every plosive and breath into a problem.
8. What about keyboard clacks, mouse clicks, and desk thumps?
These are classic off-axis problems, and the fix is part hardware, part placement.
-
Keyboard and mouse:
-
Keep them at 90-135° off-axis relative to the mic's front.
-
Raise the mic and angle it down toward your mouth; your desk becomes more off-axis.
-
Desk thumps and arm squeaks:
-
Use a proper boom arm and, if available, a shock mount appropriate to your mic.
-
Tighten all arm joints and avoid resting your hands or elbows on the desk while speaking.
-
Route cables so they do not tug on the mic or arm.
In testing, microphones with low handling noise and decent built-in isolation often reduce these annoyances more effectively than an elaborate post chain.
9. Is there a simple starting point setup for a noisy home office?
Without naming specific models, here is a configuration that consistently performs well in high-noise spaces:
- Neutral dynamic cardioid spoken-word mic with good off-axis behaviour
- Sturdy boom arm mounted away from keyboard impact
- Double-layer pop filter plus foam windscreen
- Midrange interface with at least ~60 dB of gain and direct-monitoring capability
- Monitoring via closed-back headphones to avoid speaker bleed
Workflow:
- Place the mic so it is 6-8 cm from your mouth, just outside the camera frame if you are on video.
- Aim the "dead side" of the cardioid pattern toward your loudest noise source (window, door, HVAC).
- Set gain so your loudest natural speech peaks around -12 dBFS.
- Record a 30-second test and listen on headphones before every new session.
You will often find that this basic chain, properly set up, removes the need for heavy noise reduction and saves significant editing time.
Where to go from here: building your own extreme-noise comparison
If you remember only one thing, let it be this: real decisions should come from level-matched comparisons in your own room, with your own voice. Level-matched samples in real rooms tell the whole story.
To move forward:
- Borrow or rent two or three candidate mics (ideally different dynamic cardioid designs).
- Run the simple high-noise test described above with your natural background.
- Take short notes: clarity, fatigue over long listening, noise audibility when you are not speaking.
- Keep the mic that lets you forget about the room most of the time.
As your needs grow (more hosts, more locations, more demanding sponsors), you can layer on better interfaces, room treatment, and more advanced routing. But if the core mic-to-voice-to-room interaction is right, everything downstream gets easier.
In extreme environments, the "best" microphone is rarely the most glamorous. It is the one that makes your audience forget about the noise and focus on the story, with the least effort from you in post.
Related Articles