sE Electronics Neom: Podcast Audio That Needs No Magic
By Nora Adeyemi • 3rd Mar
You don't need a soundproof booth or a mixing engineer to sound like you belong behind a microphone. What you need is a USB microphone that handles the hard part for you, one that captures warmth and clarity from your actual voice in your actual room, without requiring a PhD in signal flow to unlock. The sE Electronics Neom review reveals a microphone built specifically for this, the best beginner podcast setup when paired with a clear, repeatable process that transforms anxiety into confidence.
Too many first-time podcasters inherit the assumption that great audio lives behind complex gear and heavy editing. They buy a popular microphone, set it up randomly, and then spend hours in post-production wrestling with thin, harsh recordings. What they actually needed was permission to start simple, and a plug-and-play microphone that gives them honest feedback the moment they hit record.
This is where the Neom changes the game. It's not flashy. It's not packed with artificial features or bloated software. Instead, it does one thing exceptionally well: it gets your voice onto a clean digital track so you can hear exactly what you sound like, fix technique problems immediately, and move forward without regret.
Why Beginners Struggle (And Why It Matters)
When you're starting a podcast, you're already managing a dozen moving parts: your talking points, your guest, your camera angle, your audio levels, and the creeping worry that you sound weird. The last thing you need is a microphone that demands expertise you don't have yet.
The typical beginner journey looks like this:
- You buy a USB microphone based on internet recommendations without knowing how it behaves with your voice in your room.
- You set the gain knob to "somewhere in the middle" because you don't understand input levels.
- You record for 30 minutes, hit playback, and hear harsh sibilance, proximity rumble, or thin air where your voice should be.
- You rerecord. You try again. You blame the microphone.
- Or worse: you buy the next microphone, repeating the cycle.
None of this is your fault. Microphones are pressure devices, amplifying both your intention and your uncertainty. Without a clear setup checklist and honest feedback as you're recording, you're flying blind.
A beginner podcast setup isn't about owning the most expensive gear. It's about owning a process that works reliably, every single take. Small, repeatable wins turn scary red lights into green.
Introducing the sE Electronics Neom: Built for Real Rooms
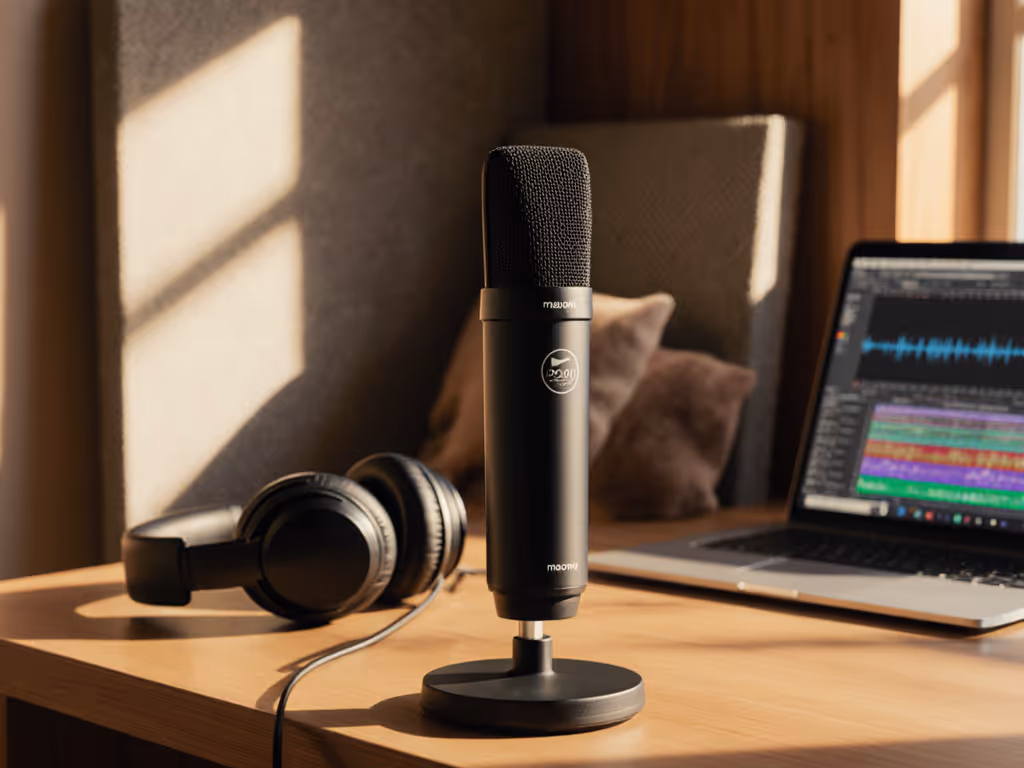
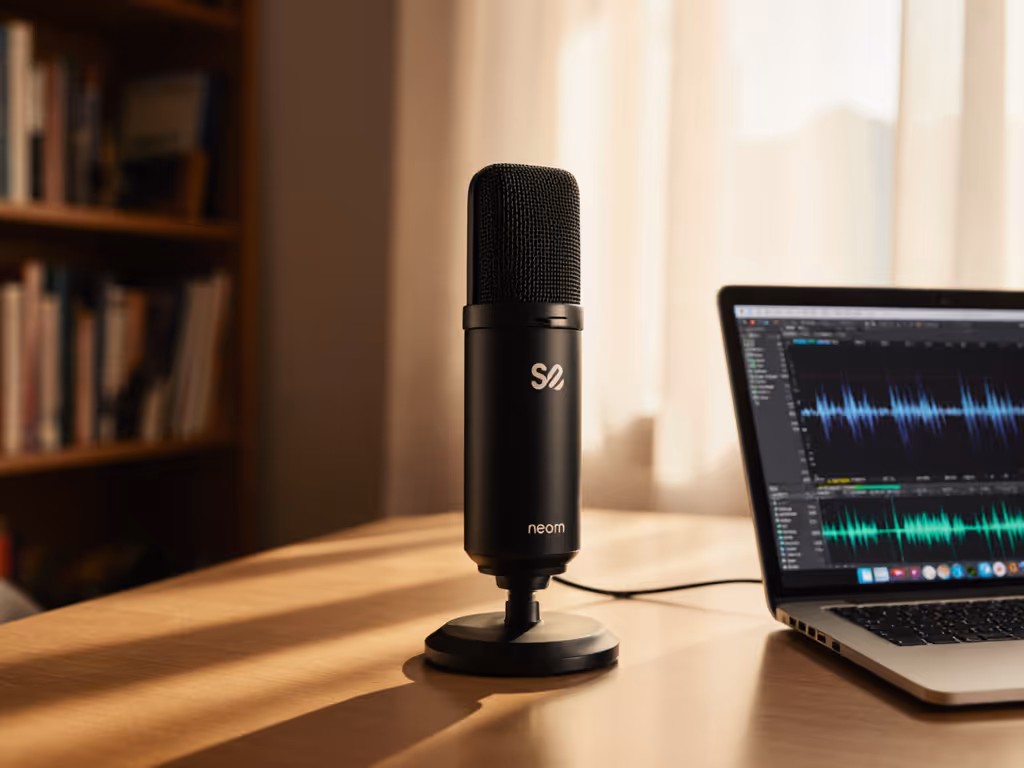
The Neom is a 16mm cardioid condenser microphone that arrives as a complete package: microphone, metal desktop stand, mic clip, and thread adapter. Plug it into a USB port (USB-C, compatible with Mac, Windows, iOS, and Android), and you're ready to record.
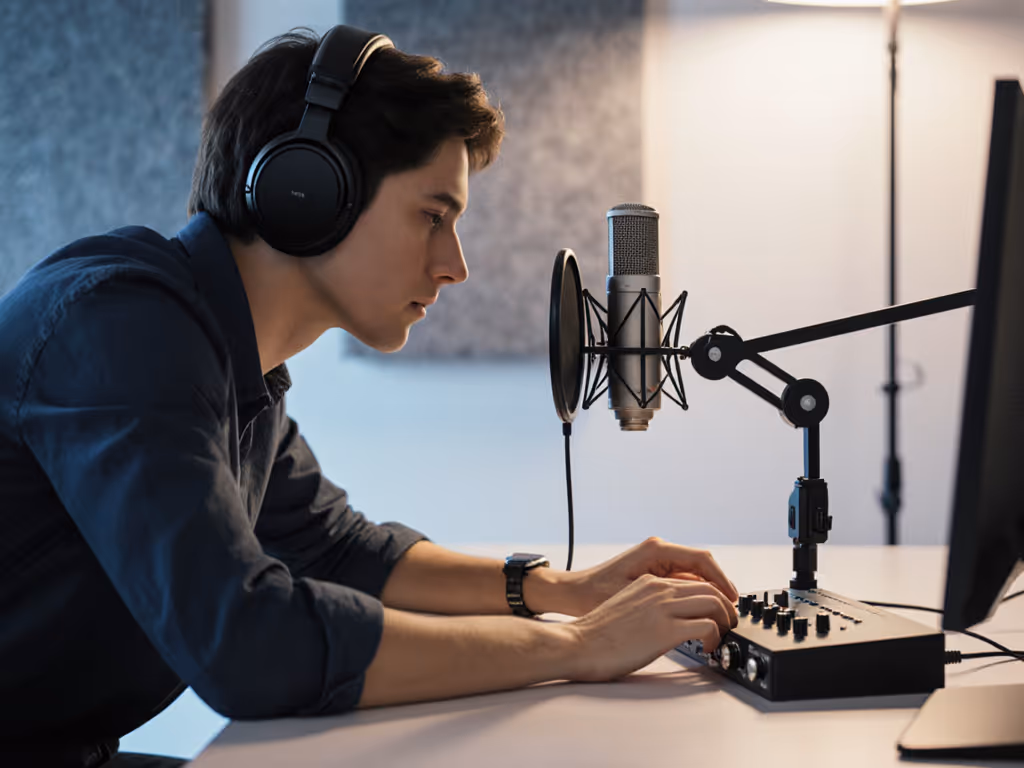
What's remarkable isn't what the Neom adds, it's what it removes. No software drivers to install (though Windows users can opt for a custom ASIO driver for additional control). No preamp needed. No mystery knobs. Just three physical controls on the front, each with a clear job, and a headphone output on the back for direct, latency-free monitoring.
The Core Specs: What They Mean
The Neom records at sample rates from 44.1kHz to 192kHz with 24-bit depth, frequency response from 20Hz to 20kHz, and weighs just 445 grams. In plain terms: it captures everything a human voice or acoustic instrument produces, with enough fidelity that you won't lose warmth or clarity, and it's light enough to pack in a backpack for remote recording.
Its cardioid polar pattern is tuned to pick up sound directly in front of it while rejecting sound from the sides and rear. In a bedroom or home office where reflective surfaces surround you, this matters. The microphone naturally tells your room to be quieter, so you don't have to rely on aggressive noise reduction in post-production.
The frequency response features a subtle boost around 12kHz, which keeps voices articulate and present without sounding harsh, essential when you're recording in an untreated space where every word needs to cut through. Real-world testers confirmed this: the Neom delivered "clear and had a bit of warmth to it," even in typical home setups.
The Three Knobs That Matter
On the front of the Neom, you'll find three vertical controls: Mic Gain, Mic Level, and Playback Level.
-
Mic Gain is your input knob. This is what you'll adjust during soundcheck to match your voice to the microphone's sensitivity. It goes from 0 to 11 (yes, really, a nod to Spinal Tap). A visual LED ring around the knob turns red if you're clipping, giving you instant feedback.
-
Mic Level controls what the computer receives. Once you've set your input level correctly, you typically leave this alone.
-
Playback Level controls the headphone output independently, so you can monitor your voice without changing the recording level.
This separation is crucial. Many USB microphones force you to choose between monitoring and recording level. The Neom lets you dial in your monitoring mix without accidentally distorting the track going to your DAW (Digital Audio Workstation).
Setting Up for Success: The Repeatable Process
Owning the Neom is the first step. Using it correctly is what transforms your recordings from "acceptable for a beginner" to "this sounds like a professional podcaster in a treated space."
Here's the process:
1. Room Choice and Placement
Your room choice shapes everything. For fast fixes in echoey spaces, read our room acoustics guide. Softer rooms (carpeted bedrooms, offices with curtains and bookshelves) absorb sound better than hard rooms with bare walls and tile. If you have options, choose the softer space. If not, identify the quietest corner and position yourself there.
Place the Neom's stand on a sturdy surface, desk, console, or table, where your mouth will be roughly 6 to 8 inches away. This is your fist-width distance, the spacing that captures intimacy without proximity rumble. Mark this spot with tape or a small mark on your desk so you return to it every session.
2. Gain Staging in 30 Seconds
Open your recording application. Start with the gain knob at 12 o'clock (the noon position). Speak at your normal podcast volume, conversational, not shouting, not whispering, and watch the LED ring on the Mic Gain knob. It should sit in the green or yellow zone, not red. If it's red, back off the gain knob slightly. If it's barely lit, turn it up a notch. The goal is to capture your natural dynamic range without clipping.
Don't overthink this. For deeper level-setting, use our podcast mic gain staging guide. You're looking for a signal that has room to breathe, not a waveform that touches the digital ceiling.
3. Direct Monitoring: Hear Yourself in Real Time
Plug headphones into the 3.5mm jack on the back of the Neom. Turn the Playback Level knob until you hear yourself clearly. Now start talking and listen to your tone, your mouth clicks, your breath, the unfiltered you.
This is direct monitoring, and it's where most beginner breakthroughs happen. You'll notice immediately if your voice sounds thin (gain is too low), harsh (gain is too high), or has plosives that a pop filter will tame. You don't need to finish recording, dump the file, and listen back in Audition. You know right now, and you can adjust.
I watched a first-time host clutch a microphone like an ice cream cone, peaking every laugh because she had no idea what her voice was doing. We set a pop filter at a slight angle off-axis, locked her distance with the fist-width rule, enabled direct monitoring on the Neom, and her shoulders dropped. Master distance, angle, and plosive control with our mic positioning guide. Her next take was clean, and the story finally breathed. She'd solved the problem not through editing wizardry but through immediate feedback and a repeatable setup.
Why the Neom Wins for Untreated Rooms
The real test of a beginner microphone isn't how it sounds in a treated studio. It's how it sounds in a bedroom at 7 p.m. with the HVAC system running and a neighbor's dog barking outside.
The Neom's cardioid pattern and the subtle proximity effect in its design mean it naturally emphasizes you and de-emphasizes the room. The 16mm capsule is large enough to capture hi-fidelity sound without being so large that it picks up every echo and reflection. Testers confirmed: recordings were clean and clear in typical home environments, with "solid" sound quality even at moderate gain settings.
This isn't magic. It's engineering tuned to a real use case, independent creators recording in imperfect spaces.
Zero-Post Recording: A New Standard
By "zero-post," I mean the raw recording, before any editing, compression, or EQ, should be broadcast-ready or require only light sweetening. This is the holy grail for time-constrained podcasters.
With the Neom set up correctly (right gain, right distance, right room), your track will arrive clean. Voices will sit well. Sibilance won't demand de-essing. The proximity effect will add warmth without boominess. You'll spend 10 minutes on final polish instead of 40 minutes fighting the source material.
The Direct Monitoring Advantage
Direct monitoring through the Neom's headphone output is zero-latency, meaning there's no delay between speaking and hearing yourself. Compare this to software monitoring, where your DAW introduces a small but noticeable delay, creating the unsettling experience of hearing your own voice out of sync.
Zero-latency headphone monitoring lets you:
- Hear your tone and technique while you're recording, not after.
- Catch plosives before they reach the track.
- Adjust your distance or gain immediately if something feels off.
- Build confidence by trusting what you hear in real time.
- Coach guests or co-hosts without confusion.
This feature alone justifies the Neom for beginners. It transforms recording from a guessing game into a transparent, controllable process.
sE Electronics Neom vs. Typical Beginner Alternatives
Gain Control and Feedback: Many entry-level USB microphone options hide gain adjustment in software or offer no visual feedback. The Neom's physical gain knob with an LED ring is immediate and honest.
Build Quality: The Neom weighs 445 grams and feels solid because it's mostly metal. Cheaper alternatives use plastic, which can flex, transmit stand noise, and feel cheap in your hands. For a voice-first creator, perceived quality matters, it affects how you feel behind the microphone.
Monitoring Flexibility: The dual-dial approach to headphone and playback levels is sophisticated for an entry-level studio mic. You're not forced to choose between monitoring yourself and recording cleanly.
Cross-Platform Compatibility: The Neom works on Mac, Windows, iOS, and Android without fiddling, though Windows users can install an optional ASIO driver for deeper control. This matters if you travel or record with collaborators on different devices.
Sound Character: The Neom's emphasis on clarity in the high end (around 12kHz) paired with a moderate proximity effect makes it forgiving for voices, your particular voice, without sounding brittle or thin.
Practical Setup: Your First Session
Here's a zero-friction checklist for your first recording:
- Position the stand at desk height, angled so the microphone sits at mouth level.
- Measure your distance: fist-width away from the grill.
- Set the gain knob to 12 o'clock. Speak, watch the LED.
- Adjust gain until the LED sits in yellow/green (no red clipping).
- Plug in headphones. Set Playback Level to a comfortable volume.
- Listen to yourself. Hear your tone, your sibilance, your breath.
- Optional: Add a pop filter at a 45-degree angle if you're prone to plosives.
- Hit record. Trust the process.
This takes 90 seconds. On your second session, it takes 30 seconds because you've already marked your distance and noted your gain setting. Lock your distance.
The Upgrade Path Ahead
One of the Neom's hidden strengths is how it sets you up for future growth without waste. If you later decide to move to an XLR microphone and interface, the Neom's metal stand, clip, and philosophy remain useful. Not sure whether to stay USB or move to XLR? Start with our XLR vs USB microphones guide.
More importantly, the Neom teaches you how to listen. You'll learn what good gain staging feels like, what direct monitoring reveals about your voice, and what your room actually sounds like without filters. These skills transfer directly to a larger setup.
For now, the Neom is your best beginner podcast setup because it removes barriers (software, drivers, complex controls) and teaches you the fundamentals (distance, gain, monitoring) through immediate, honest feedback.
Final Confidence: The Repeatable Setup
Podcasting success doesn't require a basement studio or a $3,000 microphone chain. It requires confidence, and confidence comes from knowing that when you sit down, press record, and speak, the audio will be clean, warm, and true to your voice.
The sE Electronics Neom delivers this. It's a plug-and-play microphone paired with a process: mark your distance, dial in your gain, monitor yourself in real time, and trust that the microphone is capturing what you intend.
Small, repeatable wins turn scary red lights into green.
Your Next Step
If you're starting a podcast or upgrading from a cheap USB mic, order the Neom and spend 30 minutes on your first setup session. Don't just plug it in and hope, follow the checklist above. Mark your fist-width distance, dial in the gain until the LED sits right, and listen to yourself through headphones.
Then record a 5-minute test episode. Listen back in your DAW. You'll hear clarity, warmth, and a voice that sounds ready. No magic. Just a microphone that works, a room you chose, and a distance you locked in.
That's the foundation. Everything else builds from there.
Related Articles