Podcast Reference Tones: Consistent Audio Made Simple
By Nora Adeyemi • 9th Nov
Let's cut through the noise: your podcast microphone shouldn't sound different every time you hit record. That's where audio consistency tools like reference tones become your secret weapon against uneven episodes. If you've ever cringed listening back to a take where your voice boomed in one segment and whispered in the next, or scrambled to match co-host levels during editing, you're not alone. I've seen dozens of new hosts wrestle with this exact frustration. The good news? Reliable audio isn't about pricey gear or editing wizardry. It's about tiny, repeatable wins that build confidence before you even start speaking. Small, repeatable wins turn scary red lights into green.
Why Your Episodes Sound Inconsistent (Even When You're Careful)
Green lights, not perfect waves, that's the mantra for stress-free recording. Stop chasing "studio-perfect" and start building reliability.
Most beginners assume consistency comes from fixing audio later. But here's what industry data confirms: 90% of loudness issues start during recording. When your levels drift episode-to-episode, it's usually because of unstable variables like:
- Mic distance shifting (leaning in to emphasize a point)
- Room noise fluctuations (HVAC kicking on mid-interview)
- Gain knob adjustments ("this take feels too quiet")
- Unplanned mic movement (nudging the stand during passionate moments)
Instead of wrestling with compressors later, lock down your foundation first. Remember that first-time host I mentioned? She peaked every laugh because she'd clutch the mic like an ice cream cone. We fixed it with three repeatable steps: fist-width distance, angled off-axis placement, and direct monitoring. Suddenly her voice sat perfectly in the mix, every time. No magic. Just method. For placement specifics that reduce plosives and sibilance, use our microphone positioning guide.
Your Reference Tone Cheat Sheet: Simple Setup, Zero Post-Work
Reference tones are short audio clips recorded before your main content to establish consistent levels. Think of them as your podcast's "control group." Here's how to implement them painlessly:
✅ Step 1: Record a 5-Second Tone Every Single Session
- Say: "Testing, one-two" at your natural speaking volume
- Critical: Keep the podcast microphone in exact position (use your fist-width distance trick!)
- Pro tip: Enable direct monitoring so you hear yourself without lag (this prevents instinctive volume spikes).
✅ Step 2: Store & Compare Tones Across Episodes
- Save tones in a dedicated "Reference" folder labeled by date
- Before editing, import your last episode's tone alongside the new one
- Check visually: Waveforms should match height (aim for peaks around -12dB) If you're unsure about ideal peak targets and headroom, follow our podcast mic gain staging guide.
- Check audibly: Play both tones back-to-back. If one sounds quieter, adjust gain before recording next time.
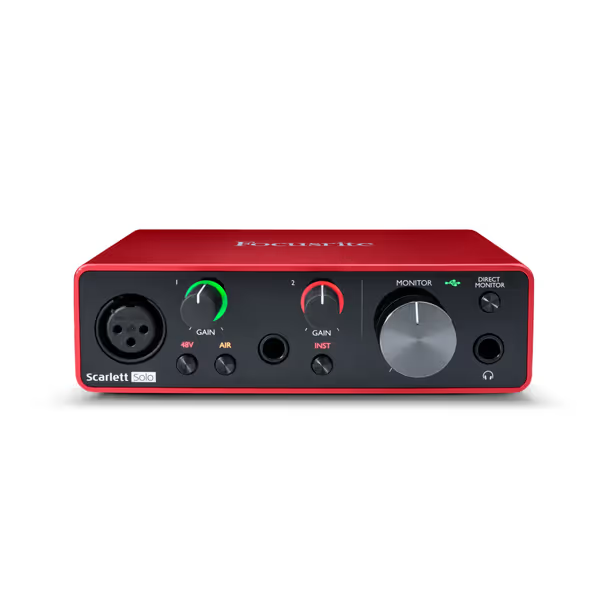
Focusrite Scarlett Solo 3rd Gen
Studio-quality sound for guitarists, vocalists, podcasters, and producers.
$109.99
Resolution24-bit/192kHz
Resolution24-bit/192kHz
Pros
Easy plug-and-play setup for beginners.
Clean preamps with 'Air' mode for clarity.
Includes a comprehensive software bundle.
Cons
Some users report static or output distortion.
It's a good budget option that works well with condenser mics and Band Lab software, with amazing sound quality and simple plug-and-play setup. It's a piece of cake for beginners.
It's a good budget option that works well with condenser mics and Band Lab software, with amazing sound quality and simple plug-and-play setup. It's a piece of cake for beginners.
✅ Step 3: Calibrate for Co-Hosts & Remote Guests
- Have each person record their own reference tone in their location
- Match microphone frequency testing levels by adjusting physical distance (not software)
- Example: If Guest A's tone peaks at -10dB and Guest B at -18dB, have Guest B move closer to their mic until waveforms align
- Never boost quiet recordings digitally (this amplifies noise). Fix at the source!
Troubleshooting Real-World Setups (No Studio Needed)
🛠 Problem: "My room sounds echoey, tone levels still jump!"
Fix: Your reference tone techniques must account for room acoustics. Record tones in your actual recording spot (not a closet!). For a deeper fix that tames echo and flutter, see our room acoustics guide. If peaks vary more than 3dB between tones:
- Hang a thick blanket behind your chair (absorbs reflections)
- Point the podcast microphone's dead zone toward noisy corners (e.g., a window for street noise; see microphone polar patterns)
- Critical: Keep gain low! Aim for -18dB peaks during tones. This gives headroom for louder moments later.
🛠 Problem: "I travel, hotel rooms wreck my consistency"
Fix: Pack a "consistency kit":
- Mini pop filter (reduces plosives in reverberant spaces)
- Phone app like Spectroid (free) to check room noise before recording
- Maintaining audio standards on-the-go: Record a reference tone in every new location. Adjust mic distance until waveform matches your home setup. (Pro tip: 1 fist-width is about 3 inches, adjust incrementally!)
🛠 Problem: "My USB mic has no gain knob, how do I stabilize levels?"
Fix: Use software you already have:
- In Audacity: Enable Software Playthrough (Options > Transport) for zero-latency monitoring
- In Reaper: Right-click track > Input monitoring > Hardware input only
- Key: Keep your voice 3-4 inches from the mic. Record reference tones with these settings locked in.
Why This Beats Endless Editing (The Confidence Shift)
Most new hosts waste hours trying to "fix" audio that was inconsistent from the start. If you're already battling pops, noise, or low volume, start with our microphone troubleshooting guide. But here's your liberation: reference tones make editing optional, not essential. When your raw recordings sit in a consistent sweet spot (-16 to -20 LUFS loudness), you'll rarely need aggressive noise reduction or compression chains. That's how you achieve zero-post audio.
Confidence starts with a repeatable setup that sounds good without editing wizardry. I've watched hesitant creators transform the moment they realize: "I don't need to be an audio engineer. I just need to trust my tone." When your levels stay stable, your voice relaxes. Your stories breathe. And that red peak light? It becomes a green light for authenticity.
Take Action Today: Your 3-Minute Consistency Drill
- Record a 5-second reference tone right now ("Testing, one-two")
- Save it as "[YourShowName]_Reference_2025-11-09.wav"
- Measure peak level: Play it in Audacity (View > Zoom to Fit) and hover over the waveform
If peaks exceed -10dB: Step back slightly. If below -18dB: Lean in. Aim for -12dB to -15dB.
Do this before every recording session. In 30 days, you'll waste less time editing and more time connecting, with green lights, not perfect waves.
Related Articles