3+ Person Podcast Setup: Stop Room Noise Nightmares
By Mei-Lin Zhou • 15th Dec
When your basic podcast setup can't handle overlapping voices in a group discussion, you lose more than take five - you lose momentum, chemistry, and hours in editing hell. A group discussion microphone strategy built for real rooms (not pristine studios) is the only way to capture natural conversation without drowning in room noise. I've seen panel discussions derailed by keyboard clicks, HVAC hum, and off-mic voices that bleed into every track. The fix isn't more processing - it's positioning. Let's fix what specsheets ignore: how your gear actually behaves when three people lean into a shared desk.
Why Your Room Hates Condensers (And Loves Dynamics)
Most reviewers demo mics in treated booths. You record in a bedroom with hardwood floors and a noisy laptop fan. Condensers magnify that reality, picking up chair scrapes, mouse clicks, and even distant traffic through flimsy walls. Their hyper-sensitivity becomes a liability in untreated spaces. Dynamics, however, reject off-axis noise by design. If you're still deciding between mic types, see our dynamic vs condenser guide for untreated rooms. Models like the RØDE PodMic or Shure SM7B create a tight acceptance zone directly in front of the capsule. Voices from the side? HVAC rumbles below? They're dramatically attenuated. This isn't about "premium" sound - it's about reducing retake risk by capturing only what you want. Quiet hardware makes your voice the loudest thing in the room.
Make the desk disappear. Not with acoustic foam towers, but by decoupling mics from vibration sources and angling them away from noise paths.
Key Placement Principles for Group Dynamics
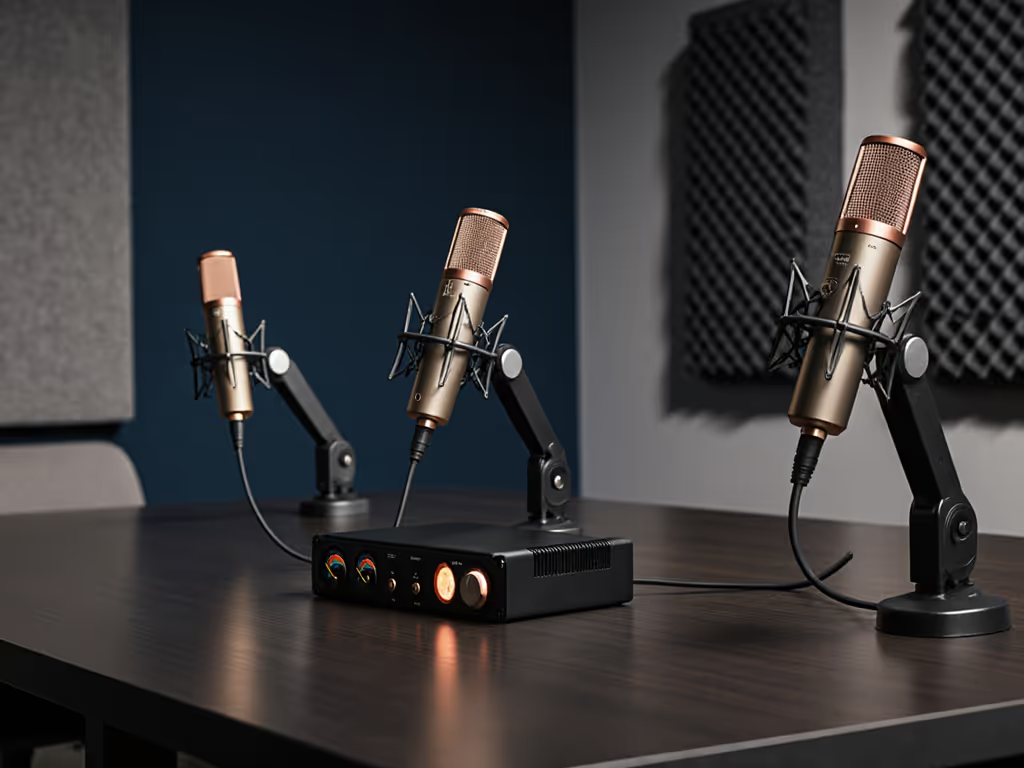
- Mount All Mics on Independent Boom Arms - Shared desks transmit handling noise like a speaker cone. If one host taps their pen, every mic hears it. Use separate boom arms (like the RØDE PSA1+) clamped to different points on the desk. This breaks resonance pathways.
- Position 4-6 Inches Off-Axis - Point mics slightly below mouth level at a 15-20° upward angle. This avoids direct plosive hits while keeping voices in the mic's sweet spot. For round-table setups, angle each mic toward the speaker's jawline (not their lips) to tame sibilance. For complete placement techniques, see our mic positioning guide for plosives and sibilance fixes.
- Stagger Distances - In panels, don't place all mics at identical distances. Have the quieter speaker 1-2 inches closer than louder voices. This creates natural level balance before recording, reducing gain-staging chaos later.
Neutralizing Desk Resonance (The Silent Track Killer)
I once watched a live webinar collapse because a guest kept bumping a hollow IKEA desk. Their condenser turned pen taps into thunderclaps. Swapping to a compact dynamic on a damped arm (set 6 inches off-axis) made the noise vanish. The lesson? Desk resonance doesn't live in your audio interface, it lives in your mounting hardware. Small upgrades like shock mounts, isolation pads, and pop filters are covered in our mic accessories guide. Cheap clamps and thin desk surfaces turn every vibration into a low-frequency nightmare.
Three-Step Desk Defense
- Isolate the Boom Arm - Place a neoprene mouse pad (or purpose-built isolation pad) between the boom arm clamp and desk surface. This damps high-frequency vibrations from clicking and typing.
- Anchor the Cable Run - Route XLR cables away from mic stands and along the desk edge using velcro straps. Loose cables act as vibration antennas, and pulling them taut reduces microphonic noise transmission.
- Add Mass Underneath - Tape a heavy book or brick beneath the desk where the boom arm clamps. This counters the resonance frequency of hollow furniture. Pro tip: Test this by rapping the desk - you want a dull thud, not a ring.
Off-Axis Placement: Your Secret Weapon for Group Clarity
In small rooms, multi-mic setups suffer from "ghost voices" - where Host B's reverb leaks into Host A's track. You can't fix this in post without artifacts. Off-axis placement solves it by leveraging a dynamic mic's rear rejection pattern. For a 3-person triangle setup:
- Host A: Mic angled toward their right shoulder (capturing their voice while rejecting Host B)
- Host B: Mic centered but tilted slightly left (rejecting Host A and Host C)
- Host C: Mic angled toward left shoulder (rejecting Host B)
This creates natural acoustic separation without head-scratching panning in your DAW. Pair this with a sync-friendly recorder like the Zoom PodTrak P4 (which handles multi-mic synchronization effortlessly via its 4-track SD card recording), and you'll eliminate the phase issues that ruin panel discussion audio. Then follow our multi-host synchronization guide to keep tracks perfectly aligned from record to edit.
Zero-Post Checklist: Record Broadcast-Ready Tracks
Stop banking on "fixing it later." Apply these checks before hitting record:
- Verify Gap Distance: Measure 4-6 inches from mic grille to speaker's chin (not mouth)
- Test Desk Taps: Rattle the desk near each mic location - adjust isolation pads until noise drops below -40dB
- Check Off-Axis Bleed: Have Host B speak while Host A's preamp level is maxed - bleed should be barely audible
- Confirm Gain Staging: Peak at -12dB with normal speaking volume (prevents clipping on sudden laughs)
- Silence Peripheral Noise: Laptop fans off, phones on airplane mode, HVAC paused
These steps target 3+ person audio configuration pitfalls that turn clean dialogue into editing quicksand. The goal? Zero-post tracks where the only edit is trimming silence.
A Studio Podcast Setup That Fits Your Reality
Forget "pro studio" fantasies. Real creators work in bedrooms with thin walls and shared spaces. To tame echo in small apartments and shared spaces, start with our room acoustics for podcasting guide. Your studio podcast setup wins when it's invisible - mics positioned so you forget they're there, arms damped so desk bumps don't derail takes, and dynamics rejecting noise so your voice cuts through naturally. When you Make the desk disappear, you don't just capture dialogue - you capture the unscripted energy that makes group podcasts magnetic.
Last month, a client recorded a 4-person debate using this exact method in a 10x12 ft apartment. No acoustic panels. No $500 mics. Just smart mic selection, isolation, and off-axis placement. Their editor spent 20 minutes trimming pauses - not wrestling with noise reduction. That's the power of a frictionless workflow.
Your Actionable Next Step: The 10-Minute Desk Audit
Grab your mic and boom arm right now. Place them on your podcast desk as if you're recording. Then:
- Tap your desk firmly near the clamp point - listen for loud thumps through headphones
- Slide a piece of foam (mouse pad, folded towel) under the clamp - retest the tap
- Adjust the boom arm angle until your voice stays strong but pen clicks reduce by half
Do this before your next session. You'll hear the difference before you say a word. Because the best group discussion microphone setup isn't about the gear you buy - it's about how you stop fighting your environment and start recording with confidence.
Related Articles